智能文章系统实战-人工智能机器学习之内容推荐(12)
发布于:2018-7-1 10:49 作者:admin 浏览:27311. 安装环境
#pip3 install pymysql
#pip3 install jieba
#pip3 install numpy
#pip3 install scipy
#pip3 install sklearn
#pip3 install pandas
2.内容推荐代码代码
#!/usr/bin/env python
#-*- coding:utf-8 -*-


#安装环境
#pip3 install pymysql
#pip3 install jieba
#pip3 install numpy
#pip3 install scipy
#pip3 install sklearn
#pip3 install pandas


#引入库
import pandas as pd #分词
import pymysql.cursors  #数据库
import re #正则过滤
import jieba #分词
from sklearn.feature_extraction.text import TfidfVectorizer  #结构化表示--向量空间模型
from sklearn.metrics.pairwise import linear_kernel


#初始化内容和分类的列表
dataList=[]


#定义函数,HTML转化为分词后用空格分离的字符串
def htmlToWords(html):
	reObject = re.compile(r'<[^>]+>',re.S)
	#过滤HTML
	text = reObject.sub('',html)
	#过滤\r\n
	text = re.sub('\t|\n|\r','',text)
	#分词
	words=jieba.cut(text)
	#把分词数组组成字符串返回
	return " ".join(words)


# 连接MySQL数据库
connection = pymysql.connect(host='localhost', port=3306, user='root', password='', db='article', charset='utf8', cursorclass=pymysql.cursors.DictCursor)

# 通过cursor创建游标
cursor = connection.cursor()

# 执行数据查询
sql = "SELECT `id`, `title`,`content` FROM `article` order by id desc limit 200"
cursor.execute(sql)

#查询数据库多条数据
result = cursor.fetchall()
for data in result:

	#HTML转化为分词后用空格分离的字符串赋值给words,此处以 标题title 进行相似度计算,也可以 文章内容content 进行相似度计算.
	item={'id':data['id'],'words':htmlToWords(data['title'])}
	dataList.append(item)


#创建数据集
ds = pd.DataFrame(dataList)

#将文本数据转化成特征向量
tf = TfidfVectorizer(analyzer='word', min_df=0, stop_words='english')
tfidf_matrix = tf.fit_transform(ds['words'])

#人工智能进行相似度计算
cosine_similarities = linear_kernel(tfidf_matrix, tfidf_matrix)
#print(cosine_similarities)


#相似结果列表
resultList={}

#每篇文章和其他文章的相似度
for idx, row in ds.iterrows():

	#排序倒序,取前 5 篇文章相似的
	similar_indices = cosine_similarities[idx].argsort()[:-6:-1]

	#输出每篇文章相似的文章ID和文章相似度
	similar_items = [(cosine_similarities[idx][i], ds['id'][i]) for i in similar_indices]

	#用字典存储每篇文章ID对应的相似度结果
	resultList[row['id']]=similar_items

#输出每篇文章ID对应的相似度结果
#print(resultList)


#数据和文章ID=14 标题相似的 文章标题
resultDs=resultList[14]
print("标题相似的结果: ",resultDs)
for row in resultDs:

	#输出相似度>0的文章
	if row[0]>0:
		# 执行数据查询
		sql = "SELECT `id`, `title` FROM `article` WHERE id='%d' LIMIT 1"%(row[1])
		cursor.execute(sql)
		data = cursor.fetchone()

		#打印结果
		print(data)
		print("相似度=",row[0])

# 关闭数据连接
connection.close()
3. 结果输出
[root@bogon python]# python3 recommend.py
Building prefix dict from the default dictionary ...
Loading model from cache /tmp/jieba.cache
Loading model cost 1.564 seconds.
Prefix dict has been built succesfully.
标题相似的结果:  [(1.0, 14), (0.23201380925542303, 67), (0.215961061528388, 11), (0.09344442103258274, 29), (0.0, 1)]
{'id': 14, 'title': '个税大利好!起征点调至每年6万 增加专项扣除'}
相似度= 1.0
{'id': 67, 'title': '个税起征点拟上调至每年6万 第7次修正百姓获益几何?'}
相似度= 0.23201380925542303
{'id': 11, 'title': '个税起征点提高利好买房?月供1万个税可降2000多元'}
相似度= 0.215961061528388
{'id': 29, 'title': '个税起征点拟提至每月5000元 月薪万元能省多少?'}
相似度= 0.09344442103258274
[root@bogon python]#
智能文章系统实战-人工智能机器学习预测文章分类(11)
发布于:2018-7-1 10:33 作者:admin 浏览:31301.安装环境
#pip3 install pymysql
#pip3 install jieba
#pip3 install numpy
#pip3 install scipy
#pip3 install sklearn
2.机器学习预测分类
#!/usr/bin/env python
#-*- coding:utf-8 -*-

#安装环境
#pip3 install pymysql
#pip3 install jieba
#pip3 install numpy
#pip3 install scipy
#pip3 install sklearn


#引入库
import pymysql.cursors  #数据库
import re #正则过滤
import jieba #分词
from sklearn.feature_extraction.text import CountVectorizer  #结构化表示--向量空间模型
from sklearn.model_selection import train_test_split #把数据分成训练集和测试集
from sklearn.naive_bayes import MultinomialNB #朴素贝叶斯分类器


#建立对象
vecObject = CountVectorizer(analyzer='word', max_features=4000,  lowercase = False)
classifierObject = MultinomialNB()

#初始化内容和分类的列表
contentList=[]
categoryList=[]


#定义函数,HTML转化为分词后用空格分离的字符串
def htmlToWords(html):
	reObject = re.compile(r'<[^>]+>',re.S)
	#过滤HTML
	text = reObject.sub('',html)
	#过滤\r\n
	text = re.sub('\t|\n|\r','',text)
	#分词
	words=jieba.cut(text)
	#把分词数组组成字符串返回
	return " ".join(words)


# 连接MySQL数据库
connection = pymysql.connect(host='localhost', port=3306, user='root', password='', db='article', charset='utf8', cursorclass=pymysql.cursors.DictCursor)

# 通过cursor创建游标
cursor = connection.cursor()

# 执行数据查询
sql = "SELECT `id`, `title`,`content`,`category` FROM `article` order by id desc limit 100"
cursor.execute(sql)

#查询数据库多条数据
result = cursor.fetchall()
for data in result:

	#HTML转化为分词后用空格分离的字符串
	wordsStr=htmlToWords(data['content'])

	#添加内容
	contentList.append(wordsStr)
	categoryList.append(data['category'])


# 关闭数据连接
connection.close()

#把数据分成训练集和测试集
x_train, x_test, y_train, y_test = train_test_split(contentList, categoryList, random_state=1)


#结构化表示--向量空间模型
vecObject.fit(x_train)

#人工智能训练数据
classifierObject.fit(vecObject.transform(x_train), y_train)

#测试 测试集,准确度
score=classifierObject.score(vecObject.transform(x_test), y_test)
print("准确度score=",score,"\n")


#新数据预测分类

#预测分类案例1
predictHTML='<p>人民币对美元中间价为6.5569,创2017年12月25日以来最弱水平。人民币贬值成为市场讨论的热点,在美元短暂升值下,新兴市场货币贬值问题也备受关注。然而,从货币本身的升值与贬值来看,货币贬值的收益率与促进性是正常的,反而货币升值的破坏与打击则是明显的。当前人民币贬值正在进行中,市场预期破7的舆论喧嚣而起。尽管笔者也预计过年内破7的概率存在,但此时伴随中国股市下跌局面,我们应该审慎面对这一问题。</p>' #新的文章内容HTML
predictWords=htmlToWords(predictHTML)
predictCategory=classifierObject.predict(vecObject.transform([predictWords]))
print("案例1分词后文本=",predictWords,"\n")
print("案例1预测文本类别=","".join(predictCategory),"\n\n\n")


#预测分类案例2
predictHTML='<p>25日在报道称,央视罕见播放了多枚“东风-10A”巡航导弹同时命中一栋大楼的画面,坚固的钢筋混凝土建筑在导弹的打击下,瞬间灰飞烟灭。这种一栋大楼瞬间被毁的恐怖画面,很可能是在预演一种教科书式的斩首行动,表明解放军具备了超远距离的精准打击能力</p>' #新的文章内容HTML
predictWords=htmlToWords(predictHTML)
predictCategory=classifierObject.predict(vecObject.transform([predictWords]))
print("案例2分词后文本=",predictWords,"\n")
print("案例2预测文本类别=","".join(predictCategory),"\n")
3.输出结果
[root@bogon python]# python3 predictCategory.py
Building prefix dict from the default dictionary ...
Loading model from cache /tmp/jieba.cache
Loading model cost 1.588 seconds.
Prefix dict has been built succesfully.
准确度score= 0.8571428571428571

案例1分词后文本= 人民币 对 美元 中间价 为 6.5569 , 创 2017 年 12 月 25 日 以来 最 弱 水平 。 人民币 贬值 成为 市场 讨论 的 热点 , 在 美元 短暂 升值 下 , 新兴 市场 货币贬值 问题 也 备受 关注 。 然而 , 从 货币 本身 的 升值 与 贬值 来看 , 货币贬值 的 收益率 与 促进性 是 正常 的 , 反而 货币 升值 的 破坏 与 打击 则 是 明显 的 。 当前 人民币 贬值 正在 进行 中 , 市场 预期 破 7 的 舆论 喧嚣 而 起 。 尽管 笔者 也 预计 过年 内破 7 的 概率 存在 , 但 此时 伴随 中国 股市 下跌 局面 , 我们 应该 审慎 面对 这一 问题 。

案例1预测文本类别= 金融


案例2分词后文本= 25 日 在 报道 称 , 央视 罕见 播放 了 多枚 “ 东风 - 10A ” 巡航导弹 同时 命中 一栋 大楼 的 画面 , 坚固 的 钢筋 混凝土 建筑 在 导弹 的 打击 下 , 瞬间 灰飞烟灭 。 这种 一栋 大楼 瞬间 被 毁 的 恐怖 画面 , 很 可能 是 在 预演 一种 教科书 式 的 斩首 行动 , 表明 解放军 具备 了 超 远距离 的 精准 打击 能力

案例2预测文本类别= 军事

[root@bogon python]#
智能文章系统实战-小程序(10)
发布于:2018-6-24 22:55 作者:admin 浏览:3149
1.配置页面
{
  "pages":[
    "pages/index/index",
    "pages/list/index",
    "pages/show/index",
    "pages/logs/logs"
  ],
  "window":{
    "backgroundTextStyle":"light",
    "navigationBarBackgroundColor": "#fff",
    "navigationBarTitleText": "WeChat",
    "navigationBarTextStyle":"black"
  }
}
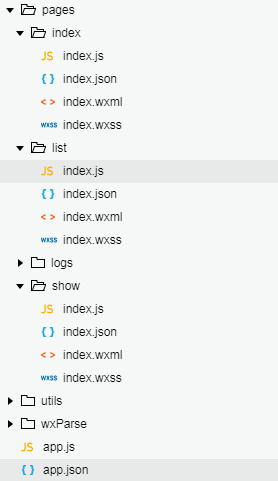
2. 文件目录
3. 首页内容
3.1 首页模板
<!--index.wxml-->
<view class="container">
  <view class="userinfo">
    <button wx:if="{{!hasUserInfo && canIUse}}" open-type="getUserInfo" bindgetuserinfo="getUserInfo"> 获取头像昵称 </button>
    <block wx:else>
      <image bindtap="bindViewTap" class="userinfo-avatar" src="{{userInfo.avatarUrl}}" mode="cover"></image>
      <text class="userinfo-nickname">{{userInfo.nickName}}</text>
    </block>
  </view>
  <view class="usermotto">
    <text class="user-motto" bindtap="enterSystem" >{{motto}}</text>
  </view>
</view>
3.2样式文件
/**index.wxss**/
.userinfo {
  display: flex;
  flex-direction: column;
  align-items: center;
}

.userinfo-avatar {
  width: 128rpx;
  height: 128rpx;
  margin: 20rpx;
  border-radius: 50%;
}

.userinfo-nickname {
  color: #aaa;
}

.usermotto {
  margin-top: 200px;
}
3.3处理程序
//index.js
//获取应用实例
const app = getApp()

Page({
  data: {
    motto: '进入系统',
    userInfo: {},
    hasUserInfo: false,
    canIUse: wx.canIUse('button.open-type.getUserInfo')
  },
  //事件处理函数
  bindViewTap: function() {
    console.log("bindViewTap")
  },
  onLoad: function () {
    if (app.globalData.userInfo) {
      this.setData({
        userInfo: app.globalData.userInfo,
        hasUserInfo: true
      })
    } else if (this.data.canIUse){
      // 由于 getUserInfo 是网络请求,可能会在 Page.onLoad 之后才返回
      // 所以此处加入 callback 以防止这种情况
      app.userInfoReadyCallback = res => {
        this.setData({
          userInfo: res.userInfo,
          hasUserInfo: true
        })
      }
    } else {
      // 在没有 open-type=getUserInfo 版本的兼容处理
      wx.getUserInfo({
        success: res => {
          app.globalData.userInfo = res.userInfo
          this.setData({
            userInfo: res.userInfo,
            hasUserInfo: true
          })
        }
      })
    }
  },
  getUserInfo: function(e) {
    console.log(e)
    app.globalData.userInfo = e.detail.userInfo
    this.setData({
      userInfo: e.detail.userInfo,
      hasUserInfo: true
    })
  }
  ,
  enterSystem: function (e) {
    wx.navigateTo({
      url: '../list/index'
    })
  }
})
3.4 配置文件 index.json
{
  "navigationBarTitleText": "智能文章系统小程序"
}
4. 列表页内容
4.1 配置文件 /pages/list/index.json
{
  "navigationBarTitleText": "文章详细内容"
}
4.2 模板文件 /pages/list/index.wxml
<!--pages/list/index.wxml-->
<scroll-view scroll-y="true" style="height:{{scrollHeight}}px;" class="list" bindscrolltolower="bindDownLoad"  bindscrolltoupper="refresh">
<block wx:for="{{list}}">
	<view class="weui_cell" data-url="{{item.id}}" bindtap="navTo">
		<view class="weui_cell_hd">{{item.title}}</view>
  </view>
</block>
</scroll-view>
4.3 样式文件 /pages/list/index.wxss
 /* pages/list/index.wxss */
.weui_cell {

    display: block;
    padding: 10px;
    -webkit-box-align: center;
    -ms-flex-align: center;
    align-items: center;
    border-bottom: 1px solid #dadada;
    line-height: 25px;
    height: 25px;

}

.weui_cell_hd {

    width: 100%;
    margin-right: 10px;
    text-align: left;
    float: left;
    font-size: 14px;
    color: #00F;
}
4.4 处理程序 /pages/list/index.js
// pages/list/index.js
var currentPage = 1
var GetList = function (that) {
  wx.showLoading({
    title: '加载中....',
  })
  wx.request({
    url: https://news.demo.com/app.php', //仅为示例,并非真实的接口地址
    data: { page: currentPage, pagesize: 10},
    header: {
      'content-type': 'application/json' // 默认值
    },
    success: function (res) {
      console.log(res.data)
      var errCode = res.data.errCode
      if (errCode == 0) {
        var oldList = that.data.list
        var tempList = res.data.data
        for (var i = 0; i < tempList.length; i++) {
          oldList.push(tempList[i]);
        }

        console.log(tempList);
        that.setData({ list: oldList })
        currentPage++

      }
      else {
        wx.showToast({
          title: res.data.errMsg,
          duration: 2000
        })
      }

      wx.hideLoading()


    }
  })


}


Page({

  /**
   * 页面的初始数据
   */
  data: {
    list: [],
    currentPage: 1
  },

  /**
   * 生命周期函数--监听页面加载
   */
  onLoad: function (options) {

    currentPage = 1;
    var that = this;
    wx.getSystemInfo({
      success: function (res) {
        console.info(res.windowHeight);
        that.setData({
          scrollHeight: res.windowHeight
        });
      }
    });
    console.log("onLoad");
  },

  /**
   * 生命周期函数--监听页面初次渲染完成
   */
  onReady: function () {
    console.log("onReady");
  },

  /**
   * 生命周期函数--监听页面显示
   */
  onShow: function () {
    console.log("onShow");
    currentPage = 1
    var that = this;
    GetList(that);
  },

  /**
   * 生命周期函数--监听页面隐藏
   */
  onHide: function () {
    console.log("onHide");
  },

  /**
   * 生命周期函数--监听页面卸载
   */
  onUnload: function () {
    console.log("onUnload");
  },

  /**
   * 页面相关事件处理函数--监听用户下拉动作
   */
  onPullDownRefresh: function () {
    console.log("onPullDownRefresh");
  },

  /**
   * 页面上拉触底事件的处理函数
   */
  onReachBottom: function () {
    console.log("onReachBottom");
  },

  /**
   * 用户点击右上角分享
   */
  onShareAppMessage: function () {
    console.log("onShareAppMessage");
  },

  bindDownLoad: function () {
    //   该方法绑定了页面滑动到底部的事件
    console.log("bindDownLoad");
    var that = this;
    GetList(that);

  },

  refresh: function (event) {
    //   该方法绑定了页面滑动到顶部的事件,然后做上拉刷新
    console.log("refresh");
    currentPage = 1;
    this.setData({
      list: []
    });
    GetList(this)
  },

  navTo: function (event) {
    var iid = event.currentTarget.dataset.url;
    console.log(iid)
    wx.navigateTo({
      url: '../show/index?iid=' + iid
    })
  }


})
5. 详细页内容
5.1 配置文件
{
  "navigationBarTitleText": "文章详细内容"
}
5.2 模板文件
<!--pages/show/index.wxml-->
<import src="/wxParse/wxParse.wxml"/>
<view class="wxParse">
<template is="wxParse" data="{{wxParseData:article.nodes}}"/>
</view>
5.3 样式文件
/* pages/show/index.wxss */
@import "/wxParse/wxParse.wxss";
5.4 处理程序
// pages/show/index.js
var app = getApp();
var WxParse = require('../../wxParse/wxParse.js');

Page({

  /**
   * 页面的初始数据
   */
  data: {

  },

  /**
   * 生命周期函数--监听页面加载
   */
  onLoad: function (options) {

    console.log(options.iid)

    var that = this;

    wx.showLoading({
      title: '加载中....',
    })

    var that = this;
    wx.request({
      url: 'https://news.demo.com/h5.php?action=show&id='+options.iid, //仅为示例,并非真实的接口地址
      data: {},
      header: {
        'content-type': 'text/html' // 默认值
      },
      success: function (res) {
        console.log(res.data)
        WxParse.wxParse('article', 'html', res.data, that, 5);


        wx.hideLoading()

      }
    })

  },

  /**
   * 生命周期函数--监听页面初次渲染完成
   */
  onReady: function () {

  },

  /**
   * 生命周期函数--监听页面显示
   */
  onShow: function () {

  },

  /**
   * 生命周期函数--监听页面隐藏
   */
  onHide: function () {

  },

  /**
   * 生命周期函数--监听页面卸载
   */
  onUnload: function () {

  },

  /**
   * 页面相关事件处理函数--监听用户下拉动作
   */
  onPullDownRefresh: function () {

  },

  /**
   * 页面上拉触底事件的处理函数
   */
  onReachBottom: function () {

  },

  /**
   * 用户点击右上角分享
   */
  onShareAppMessage: function () {

  }
})
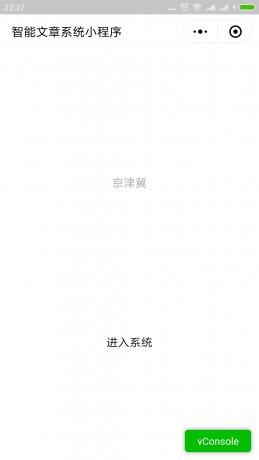
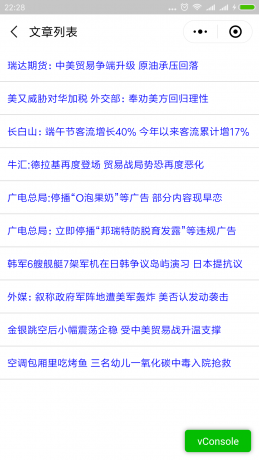
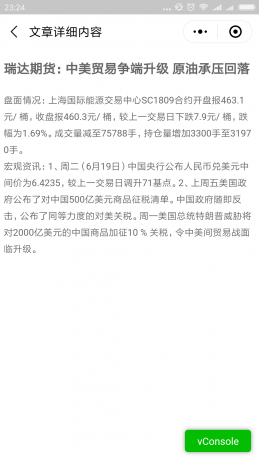
6.演示界面
7.总结
1. 首页获取 微信的基本信息用户
2. 列表是上拉自动加载内容
3. 由于微信不支持HTML显示,采用了wxParse插件解决。
智能文章系统实战-iOS文章客户端(9)
发布于:2018-6-21 22:24 作者:admin 浏览:29851. 文章实体类
class Item{

    var title="";
    var url=""

}
2.列表程序
import UIKit

class ListViewController: UIViewController,UITableViewDelegate,UITableViewDataSource {

    var dataSource:[Item]=[]
    var tv:UITableView?


    override func viewDidLoad() {
        super.viewDidLoad()

        self.view.backgroundColor=UIColor.white

        //列表
        tv=UITableView(frame:CGRect(x: 0, y: 20, width: self.view.frame.size.width, height: self.view.frame.size.height-50))
        tv!.register(UITableViewCell.self, forCellReuseIdentifier: "NewsCell")
        tv!.delegate=self;
        tv!.dataSource=self;

        self.view.addSubview(tv!)

        self.loadJsonData()

    }

    func numberOfSections(in tableView: UITableView) -> Int {
        return 1;
    }

    func tableView(_ tableView: UITableView, numberOfRowsInSection section: Int) -> Int {
        return dataSource.count;
    }

    func tableView(_ tableView: UITableView, cellForRowAt indexPath: IndexPath) -> UITableViewCell {

        let cell:UITableViewCell=tv!.dequeueReusableCell(withIdentifier: "NewsCell", for: indexPath)

        cell.accessoryType=UITableViewCellAccessoryType.disclosureIndicator
        cell.textLabel?.text=dataSource[indexPath.row].title

        return cell;
    }


    func tableView(_ tableView: UITableView, didSelectRowAt indexPath: IndexPath) {

        tv!.deselectRow(at: indexPath, animated: true)


        let itemTV=ItemViewController()
        itemTV.tit=self.dataSource[indexPath.row].title
        itemTV.url=self.dataSource[indexPath.row].url
        self.present(itemTV, animated: true, completion: nil)


    }


    override func didReceiveMemoryWarning() {
        super.didReceiveMemoryWarning()

    }


    func loadJsonData()
    {


        let url="http://news.demo.com/app.php"

        let nsurl = URL(string:url)
        let request = NSMutableURLRequest.init(url:nsurl!)


        let session = URLSession.shared
        let dataTask = session.dataTask(with: request as URLRequest) { (data, response, error) -> Void in


            if (error == nil) {

                do{
                    let responseData:NSDictionary = try JSONSerialization.jsonObject(with:data!, options:JSONSerialization.ReadingOptions.allowFragments) as! NSDictionary
                    let jsonArr=responseData["data"] as! [[String: Any]];
                    for json in jsonArr {
                        let N1=Item()
                        N1.title=json["title"] as! String
                        N1.url="http://news.demo.com/h5.php?action=show&id=\(json["id"] as! String)"
                        self.dataSource.append(N1)
                    }

                    DispatchQueue.main.async{
                        self.tv!.reloadData();
                    }

                }catch{

                }
            }
        }

        dataTask.resume()

    }


}
3.详细页程序
import UIKit

class ItemViewController: UIViewController {

    var tit:String="";
    var url:String="";
    var webview:UIWebView?


    override func viewDidLoad() {
        super.viewDidLoad()


        //关闭按钮
        let btn=UIButton(frame: CGRect(x: 0, y: 20, width: self.view.bounds.size.width, height: 20))

        btn.setTitle("返回", for: .normal)
        btn.setTitleColor(UIColor.red, for: UIControlState.normal)
        btn.addTarget(self, action: #selector(btnClick(_:)), for: .touchUpInside)
        self.view.addSubview(btn)


        //WEB浏览器
        self.view.backgroundColor=UIColor.white
        let webview=UIWebView(frame: self.view.bounds)
        webview.frame.origin.y=45;
        let urlobj = URL(string:self.url)
        let request = URLRequest(url:urlobj!)
        webview.loadRequest(request);
        self.view.addSubview(webview)


    }

    func btnClick(_ sender:UIButton)
    {
        self.dismiss(animated: true, completion: nil)
    }

    override func didReceiveMemoryWarning() {
        super.didReceiveMemoryWarning()

    }


}
智能文章系统实战-Android文章客户端(8)
发布于:2018-6-21 16:53 作者:admin 浏览:40511. 列表模板XML
<?xml version="1.0" encoding="utf-8"?>
<RelativeLayout xmlns:android="http://schemas.android.com/apk/res/android"
    xmlns:tools="http://schemas.android.com/tools"
    android:id="@+id/activity_main"
    android:layout_width="match_parent"
    android:layout_height="match_parent"
    android:paddingBottom="@dimen/activity_vertical_margin"
    android:paddingLeft="@dimen/activity_horizontal_margin"
    android:paddingRight="@dimen/activity_horizontal_margin"
    android:paddingTop="@dimen/activity_vertical_margin"
    tools:context="com.demo.article.MainActivity">

    <ListView
        android:id="@+id/listview"
        android:layout_width="match_parent"
        android:layout_height="match_parent"/>
</RelativeLayout>
2.列表项模板
<?xml version="1.0" encoding="utf-8"?>
<LinearLayout xmlns:android="http://schemas.android.com/apk/res/android"
    android:layout_width="match_parent"
    android:layout_height="match_parent">
    <TextView
        android:id="@+id/title"
        android:layout_width="wrap_content"
        android:layout_height="wrap_content"
        android:layout_gravity="center_vertical"
    />
</LinearLayout>
3.文章类程序
public class Item {
    private int id;
	private String title;
    private String url;

    public Item(int id,String title, String url) {
        this.id = id;
        this.title = title;
		this.url = url;
    }

    public int getId() {
        return id;
    }

    public String getTitle() {
        return title;
    }

	public String getUrl() {
        return url;
    }
}
4.数据适配器
public class ItemAdapter extends ArrayAdapter<Item> {
    private int layoutId;

    public ItemAdapter(Context context, int layoutId, List<Item> list) {
        super(context, layoutId, list);
        this.layoutId = layoutId;
    }

    @Override
    public View getView(int position, View convertView, ViewGroup parent) {

        View view;
        ViewHolder viewHolder;
        Item item = getItem(position);
        if (convertView == null) {
            view = LayoutInflater.from(getContext()).inflate(layoutId, parent, false);
            viewHolder = new ViewHolder();
            viewHolder.textView = (TextView) view.findViewById(R.id.title);
            view.setTag(viewHolder);
        } else {
            view = convertView;
            viewHolder = (ViewHolder) view.getTag();
        }
        viewHolder.textView.setText(item.getTitle());

        return view;
    }

    class ViewHolder {
        TextView textView;
    }
}
3.列表程序
public class MainActivity extends Activity {
	private List<Item> list = new ArrayList<>();
	private ListView listView
	private ItemAdapter<Item> itemAdapter;
    private ProgressDialog dialog;

	@Override
	protected void onCreate(Bundle savedInstanceState) {
		super.onCreate(savedInstanceState);
		setContentView(R.layout.activity_main);

		/*
		//初始化数据
		initList();

		//用自定义的数据适配器和自定义的布局显示列表
		ItemAdapter itemAdapter = new ItemAdapter(MainActivity.this, R.layout.item, list);
		ListView listView = (ListView) findViewById(R.id.listview);
		listView.setAdapter(itemAdapter);
		*/


		//进度条
		dialog = new ProgressDialog(MainActivity.this);

		//列表显示控件listView
		listView = (ListView) findViewById(R.id.listview);

		//请求服务器获取数据,解析数据,加载列表
        new dataAsyncTask().execute("http://news.demo.com/app.php");


		//短暂点击跳到详情页
		listView.setOnItemClickListener(new AdapterView.OnItemClickListener() {

			@Override
			public void onItemClick(AdapterView<?> parent, View view, int position, long id) {

				//详情页
				Item item = list.get(position);
				Intent intent = new Intent(MainActivity.this, ContentActivity.class);
				intent.putExtra("title",item.getTitle());
                intent.putExtra("url",item.getUrl());
                startActivity(intent);

			}
		});

		//长按Toast显示标题
		listView.setOnItemLongClickListener(new AdapterView.OnItemLongClickListener() {
			@Override
			public boolean onItemLongClick(AdapterView<?> parent, View view, int position, long id) {
				Item item = list.get(position);
				Toast.makeText(MainActivity.this, "long click " + item.getTitle(), Toast.LENGTH_SHORT).show();

				return true;
			}
		});
	}

	//仅仅用来做测试,实际是对接的服务器接口的数据
    private void initList() {
        for (int i = 0; i < 100; i++) {
            //public Item(int id,String title, String url)
			Item item = new Item(i,"T" + i, "#" + i);
            list.add(item);
        }
    }


	//解析JSON数据
    private List<Item> parseJSON(jsonStr)
        JSONObject obj = new JSONObject(jsonStr); //最外层的JSONObject对象
		String errCode = obj.getString("errCode");//通过errCode字段获取其所包含的字符串
		String errMsg =  obj.getString("errMsg"); //通过errMsg字段获取其所包含的字符串

        JSONArray array = obj.getJSONArray("data");
        for(int i = 0 ; i<array.length();i++){
            JSONObject jsonObj = array.getJSONObject(i); //索引值,获取数组中包含的值

			//System.out.println(jsonObj.getString("title"));

			//把即系的数据加载到列表里
			Item item = new Item(jsonObj.getInt("id"),jsonObj.getString("title"),jsonObj.getString("url"));
            list.add(item);

        }
		return list;
    }


	//请求服务器数据
    public String httpData(String path)
    {
        String result = "";
        HttpClient httpClient = new DefaultHttpClient();
        try
        {
            HttpPost httpPost = new HttpPost(path);
            HttpResponse httpResponse = httpClient.execute(httpPost);
            if(httpResponse.getStatusLine().getStatusCode() == HttpStatus.SC_OK)
            {
                HttpEntity httpEntity = httpResponse.getEntity();
                if(httpEntity != null)
                {
                    result = EntityUtils.toString(httpEntity, "utf-8");
                }
            }
        }
        catch (Exception e)
        {
            e.printStackTrace();
        }
        finally
        {
            httpClient.getConnectionManager().shutdown();
        }

        return result;
    }


	public class dataAsyncTask extends AsyncTask<String, Void, List<String>>
    {
        @Override
        protected void onPreExecute()
        {
			//预加载
            dialog.setTitle("提示信息");
            dialog.setMessage("loading......");
            dialog.setProgressStyle(ProgressDialog.STYLE_SPINNER);
            dialog.setCancelable(false);
			dialog.show();
        }


        @Override
        protected List<Item> doInBackground(String... params)
        {
			//后台解析数据
            List<Item> tempList = new ArrayList<Item>();
            String jsonStr = httpData(params[0]);
            //解析服务器端的json数据
            tempList = parseJSON(jsonStr);
			return tempList;
        }

        @Override
        protected void onPostExecute(List<Item> list)
        {
			//显示列表数据
			itemAdapter = new ItemAdapter(MainActivity.this, R.layout.item, list);
			listView.setAdapter(itemAdapter);
            dialog.dismiss();
        }
    }


}
4.详细页模板
<?xml version="1.0" encoding="utf-8"?>
<android.support.design.widget.CoordinatorLayout
    xmlns:android="http://schemas.android.com/apk/res/android"
    xmlns:app="http://schemas.android.com/apk/res-auto"
    android:layout_width="match_parent"
    android:layout_height="match_parent"
    android:background="@color/color_White">
    <WebView
        android:id="@+id/web_view"
        android:layout_width="match_parent"
        android:layout_height="match_parent"
    />

</android.support.design.widget.CoordinatorLayout>
5.详细页程序
public class ContentActivity extends Activity {
    private WebView webView;


    @Override
    protected void onCreate(Bundle savedInstanceState) {
        super.onCreate(savedInstanceState);
        setContentView(R.layout.activity_content);


        webView = (WebView)findViewById(R.id.web_view);
        webView.getSettings().setJavaScriptEnabled(true);
        webView.setWebViewClient(new WebViewClient());

        String url = getIntent().getStringExtra("url");
        //String title = getIntent().getStringExtra("title");
        webView.loadUrl(url);

    }
}
6. 临时总结
暂时没有实现 下拉刷新,上拉加载更多数据,目前仅仅加载第1页的数据。后期优化。
adapter.setData(list);//刷新列表数据
adapter.notifyDataSetChanged();
智能文章系统实战-移动API(7)
发布于:2018-6-21 12:01 作者:admin 浏览:31771. 移动API (app.php)
<?php
require_once('./inc.php');

//为Andriod和iOS提供数据接口

$action=addslashesObj($_REQUEST['action']);
switch($action)
{
	//只有一个列表数据接口
	default:

        $size=10;
        $page=intval($_REQUEST['page']);
        if($page<=0)
        {
            $page=1;
        }
        $offset=($page-1)*$size;

        $DATA=array();
        $sql="SELECT * FROM article ORDER BY id DESC LIMIT {$offset},{$size}";
        $result=$db->query($sql);
        while($result && $info=$result->fetch_array())
        {

			$DATA[]=array(
			'id'=>$info['id'],
			'title'=>$info['title'],
			'url'=>'http://news.demo.com/h5.php?action=show&id='.$info['id'],
			);
        }
        showJson(0,'',$DATA);
    break;

}
2. 结果展示
访问 http://news.demo.com/app.php
{
    "errCode": 0,
    "errMsg": "",
    "data": [{
        "id": "138",
        "title": "瑞达期货:中美贸易争端升级 原油承压回落",
        "url": "http://news.demo.com/h5.php?action=show&id=138"
    }, {
        "id": "137",
        "title": "美又威胁对华加税 外交部:奉劝美方回归理性",
        "url": "http://news.demo.com/h5.php?action=show&id=137"
    }, {
        "id": "136",
        "title": "长白山:端午节客流增长40% 今年以来客流累计增17%",
        "url": "http://news.demo.com/h5.php?action=show&id=136"
    }, {
        "id": "135",
        "title": "牛汇:德拉基再度登场 贸易战局势恐再度恶化",
        "url": "http://news.demo.com/h5.php?action=show&id=135"
    }, {
        "id": "134",
        "title": "广电总局:停播“O泡果奶”等广告 部分内容现早恋",
        "url": "http://news.demo.com/h5.php?action=show&id=134"
    }, {
        "id": "133",
        "title": "广电总局:立即停播“邦瑞特防脱育发露”等违规广告",
        "url": "http://news.demo.com/h5.php?action=show&id=133"
    }, {
        "id": "132",
        "title": "韩军6艘舰艇7架军机在日韩争议岛屿演习 日本提抗议",
        "url": "http://news.demo.com/h5.php?action=show&id=132"
    }, {
        "id": "131",
        "title": "外媒:叙称政府军阵地遭美军轰炸 美否认发动袭击",
        "url": "http://news.demo.com/h5.php?action=show&id=131"
    }, {
        "id": "130",
        "title": "金银跳空后小幅震荡企稳 受中美贸易战升温支撑",
        "url": "http://news.demo.com/h5.php?action=show&id=130"
    }, {
        "id": "129",
        "title": "空调包厢里吃烤鱼 三名幼儿一氧化碳中毒入院抢救",
        "url": "http://news.demo.com/h5.php?action=show&id=129"
    }]
}
智能文章系统实战-H5页面(6)
发布于:2018-6-21 10:59 作者:admin 浏览:31511.H5逻辑层
<?php
require_once('./inc.php');


$action=addslashesObj($_REQUEST['action']);
switch($action)
{


	case 'show':
	//获取参数
	$id=intval($_REQUEST['id']);

	//显示新闻内容
	$sql="SELECT * FROM article WHERE id='".$id."'";
	$result=$db->query($sql);
	if($result && $info=$result->fetch_array())
	{
		$TEMPLATE['info']=$info;
		parseTemplate('/views/h5/article/show.php');
	}
	else
	{
		$TEMPLATE['info']=array();
		parseTemplate('/views/h5/article/show.php');
	}
	break;


	default:

        $sql="SELECT count(*) as num FROM article";
        $result=$db->query($sql);
        $info=$result->fetch_array();
        $allnum=intval($info['num']);

        $size=10;
        $page=intval($_REQUEST['page']);

        $maxpage=ceil($allnum/$size);
        if($page>$maxpage)
        {
                $page=$maxpage;
        }
        if($page<=0)
        {
                $page=1;
        }


        $offset=($page-1)*$size;

        $DATA=array();
        $sql="SELECT * FROM article ORDER BY id DESC LIMIT {$offset},{$size}";
        $result=$db->query($sql);
        while($result && $info=$result->fetch_array())
        {
                $DATA[]=$info;
        }
        $TEMPLATE['list']=$DATA;
        $TEMPLATE['page']=$page;
        parseTemplate('/views/h5/article/list.php');
        break;


}
2.H5列表页模板
<!Doctype html>
<html>
<head>
	<meta http-equiv="Content-Type" content="text/html; charset=UTF-8" />
	<meta name="viewport" content="width=device-width, initial-scale=1.0" />
	<title>首页</title>
    <meta name="keywords" content="">
    <meta name="description" content="">
    <meta name="apple-mobile-web-app-title" content="">
    <style>
	body{background:#FFF;}
	html,body,ul,li{margin: 0px; padding:0px;}
	li{text-overflow:ellipsis; white-space:nowrap; overflow:hidden; margin: 5px; line-height:30px; border-bottom:dashed 1px #CCC;}
	li a{text-decoration:none;}
	</style>
</head>
<body>


<!--  内容  -->
<div class="container">
        <ul type="disc">
		<?php
        if($TEMPLATE['list'])
		{

			foreach($TEMPLATE['list'] as $key => $row)
			{

		?>

			<li><a target="_top" title="<?=$row['title']?>"  href="?action=show&id=<?=$row['id']?>" ><?=$row['title']?></a></li>

       <?php
			}
		}
	   ?>
		</ul>


	<nav align="center"><a href="?action=list&page=<?=$TEMPLATE['page']-1?>">上页</a>    <a href="javascript:void(0)"><?=$TEMPLATE['page']?></a>    <a href="?action=list&page=<?=$TEMPLATE['page']+1?>">下页</a></nav>

</div>


</body>
</html>
3.H5详细页模板
<!Doctype html>
<html>
<head>
	<meta http-equiv="Content-Type" content="text/html; charset=UTF-8" />
	<meta name="viewport" content="width=device-width, initial-scale=1.0" />
	<title><?=$TEMPLATE['info']['title']?></title>
    <style>
	body{background:#FFF;}
	html,body{margin: 0px; padding:0px;}
	.article-intro{margin: 5px; font-size:14px; }
	.article-intro p{text-indent: 2em; line-height:25px;}

	</style>
</head>
<body>

<div class="article-intro">
<h1><?=$TEMPLATE['info']['title']?></h1>
<div>
<?=$TEMPLATE['info']['content']?>
</div>
</div>


</body>
</html>
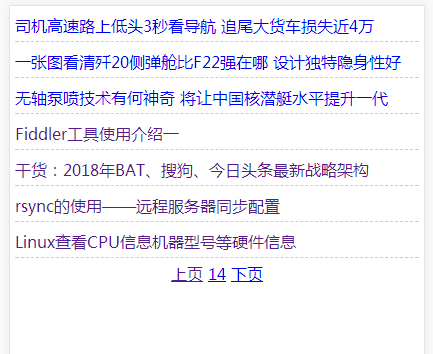
4.H5页面效果
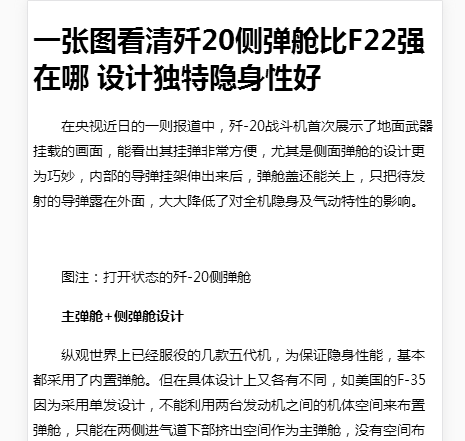
智能文章系统实战-任务列表
发布于:2018-6-20 23:03 作者:admin 浏览:2075数据库建立
后台管理
数据采集
数据全文搜索
H5/ 微信 页面展示。
---移动-----
数据库API (Restful)
Android 文章系统
iOS (swift) 文章系统
微信小程序。
---人工智能---
Python 文章分类
Python 文章智能推荐
--大数据---
Hadoop/Hive/HBase (大数据)
--补充视频的文章---
视频
-----------------------------------------------------------------------------
服务器群
文章静态生成到多服务器
数据库分离
负载均衡
监控
Docker
简易MVC框架
代码自动发布打包
智能文章系统实战-文章全文搜索应用(5)
发布于:2018-6-20 18:02 作者:admin 浏览:28431.配置索引文件
[root@localhost app]# cat article.ini
project.name = article
project.default_charset = utf-8
server.index = 8383
server.search = 8384

[id]
type = id

[title]
type = title

[content]
type = body

[times]
type = numeric

[root@localhost app]#
2.索引数据库
<?php
require_once('./inc.php');
require_once('/usr/local/soft/xunsearch/sdk/php/lib/XS.php');

$xs = new XS('article');    //article为项目名称,配置文件是 /usr/local/soft/xunsearch/sdk/app/article.ini
$index = $xs->index;   //获取索引对象

//读取 position.ini 文件中上次索引ID的位置 的文件名 (单机服务器)
$fileName='position.ini';

//清空索引
if($_GET['clean']==1)
{
	$index->clean();
	file_put_contents($fileName,0);
	exit();
}


//读取 position.ini 文件中上次索引ID的位置 (单机服务器)
$position=0;
if(file_exists($fileName))
{
	$position=intval(file_get_contents($fileName));
}
else
{
	file_put_contents($fileName,0);
}


//读取数据库的文章,进行索引。
//每5分钟更新一次说索引,每次更新100条。
$sql="SELECT * FROM article WHERE id>".$position."   ORDER BY id ASC LIMIT 100";
$result=$db->query($sql);
if($result)
{
	while($info=$result->fetch_array())
	{
		//把MYSQL数据库的数据转化到索引数据库
		$data = array(
			'id' => $info['id'], // 此字段为主键,必须指定
			'title' => $info['title'],
			'content' => strip_tags($info['content']),
			'times' => $info['times']
		);


		//创建文档对象
		$doc = new XSDocument;
		$doc->setFields($data);

		//添加到索引数据库中
		$index->add($doc);

		//记录最后ID的位置
		$position=$info['id'];
	}
}

//把最后ID的位置写入position.ini
file_put_contents($fileName,$position);

echo "Complete!";
?>
3.全文搜索
<?php
error_reporting(0);
require_once('/usr/local/soft/xunsearch/sdk/php/lib/XS.php');

$xs = new XS('article');    //demo为项目名称,配置文件是 /usr/local/soft/xunsearch/sdk/app/article.ini
$search = $xs->search;   //获取搜索对象

//获取参数
$keyword=trim($_REQUEST['keyword']);
$page=intval($_REQUEST['page']);

//关键词搜索
if($keyword)
{
	$search->setQuery($keyword);  //搜索 测试
}

//获取结果总数
$total=$search->count();
$pageSize=10;
$maxPage=ceil($total/$pageSize);
if($page>$maxPage)
{
	$page=$maxPage;
}
if($page<1)
{
	$page=1;
}
$offset=($page-1)*$pageSize;

//设置搜索分页
$search->setLimit($pageSize,$offset);

//搜索到的文档
$docs = $search->search();

//搜索结束


//开始输出页面数据
$html = <<<HTML_BEGIN
<!Doctype html>
<html>
<head>
	<meta http-equiv="Content-Type" content="text/html; charset=UTF-8" />
	<meta name="viewport" content="width=device-width, initial-scale=1.0" />
	<meta name="apple-mobile-web-app-title" content="">
	<title>全文搜索结果</title>
    <style>
	.design a{line-height:25px;}
	 body{background:#FFF;}
	em{color:#F00;}
	</style>
</head>
<body>
HTML_BEGIN;

echo $html;

echo "<ul>";
	foreach ($docs as $doc) {
		$title = $search->highlight($doc->title); //  高亮处理标题
		echo "<li><a href='#".$doc->id."'>".$title."</a></li>";
    }
echo "</ul>";
echo '<a href="?keyword='.$keyword.'&page='.($page-1).'">上一页</a>      <b>'.$page.'/'.$maxPage.'</b>     <a href="?keyword='.$keyword.'&page='.($page+1).'">下一页</a>';


$html = <<<HTML_END
</body>
</html>
HTML_END;

echo $html;
?>
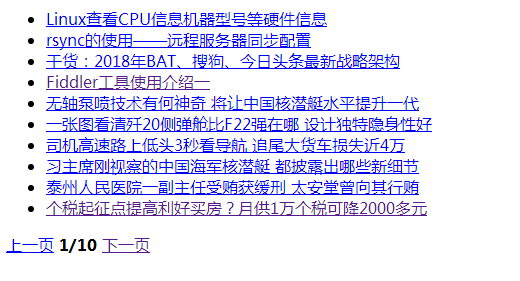
4.全文搜索结果(全部数据)
5.全文搜索结果(关键词搜索) BAT架构 (http://演示域名/search.php?keyword=BAT架构&page=1)

智能文章系统实战-文章全文搜索安装和测试(4)
发布于:2018-6-19 20:05 作者:admin 浏览:30331.运行下面指令下载、解压安装包
wget http://www.xunsearch.com/download/xunsearch-full-latest.tar.bz2
tar -xjf xunsearch-full-latest.tar.bz2
mv xunsearch-full-latest xunsearch
cd xunsearch
sh setup.sh
bin/xs-ctl.sh restart
php ./sdk/php/util/RequiredCheck.php
2.测试数据
cat ./sdk/php/app/demo.ini
./sdk/php/util/Indexer.php --source=csv --clean demo

#输入测试数据
1,关于 xunsearch 的 DEMO 项目测试,项目测试是一个很有意思的行为!,1314336158
2,测试第二篇,这里是第二篇文章的内容,1314336160
3,项目测试第三篇,俗话说,无三不成礼,所以就有了第三篇,1314336168

#测试搜索结果
./sdk/php/util/Quest.php demo 项目
3.PHP搜索
<?php
require_once('/usr/local/soft/xunsearch/sdk/php/lib/XS.php');

$xs = new XS('demo');    //demo为项目名称,配置文件是 /usr/local/soft/xunsearch/sdk/app/demo.ini
//$index = $xs->index;   //获取索引对象
$search = $xs->search;   //获取搜索对象
$search->setLimit(20);

$keyword='测试';
$docs = $search->setQuery($keyword)->search();  //搜索 测试

//var_dump($docs);

echo "<ul>";
	foreach ($docs as $doc) {
		$subject = $search->highlight($doc->subject); //  高亮处理标题
		echo "<li>".$subject."</li>";
    }
echo "</ul>";
?>
